Central air conditioning is a complex and expensive system that requires careful testing and maintenance to ensure safety, efficiency and longevity. Proper testing of central air conditioning involves a series of steps that should be followed to accurately evaluate its effectiveness and identify any potential issues. Here are some key steps to perform a thorough central air conditioning test:

1. Verify power supply and electrical connections: Before testing central air conditioning, it is critical to ensure that it is properly connected to a reliable power source and all electrical connections are secure. Failure to do so can lead to power disruption, circuit overloading or even electrical fires. Check the main breaker, wiring and electrical conduits, and ensure that all connections are tight and properly grounded.
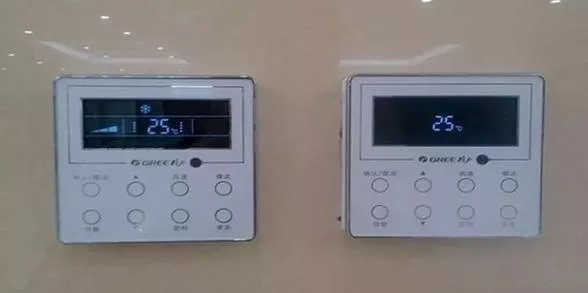
2. Test the thermostat: The thermostat is a critical component of the central air conditioning system that regulates temperature, humidity and air flow. Test the thermostat by turning it on and off and adjusting the temperature settings to ensure that it responds correctly. If the thermostat is not functioning properly, it can cause the air conditioning to malfunction or waste energy, leading to higher costs and reduced comfort.
3. Check the air filters: Air filters play a vital role in the air conditioning process as they remove dust, debris, and other pollutants from the air. Dirty air filters can reduce airflow and put a strain on the system, leading to increased energy costs, reduced efficiency and even damage to the cooling coils. Check the air filters and clean or replace them if necessary.
4. Assess the refrigerant levels: Refrigerant is the cooling agent used in central air conditioning that absorbs heat from the air and releases it outside. Insufficient refrigerant can cause the system to malfunction, increase energy consumption and wear out the compressor. Test the refrigerant levels and adjust them as needed to maintain optimal performance.
5. Measure the airflow: Proper airflow is essential for optimal air conditioning performance as it ensures that cold air is distributed evenly throughout the building. Use an anemometer to measure the airflow at different points in the system and compare it to the manufacturer's specifications. Adjust the ductwork, dampers, or fan speed to improve airflow if necessary.
6. Evaluate the cooling capacity: The cooling capacity of central air conditioning refers to the amount of heat it can absorb and remove from the air. Measure the temperature at different points in the system, including the supply and return air ducts, and compare it to the expected range. If the cooling capacity is insufficient, it can result in hotspots, reduced comfort and increased energy consumption.
7. Inspect the condenser unit: The condenser unit is responsible for dissipating heat from the refrigerant and releasing it outside. Check the condenser unit for signs of damage, obstructions or other issues that may prevent it from working correctly. Clean the condenser coils, remove any debris or obstructions, and check the fan motor and blades.
By following these steps, you can perform a comprehensive test of your central air conditioning system and identify any potential issues that may impact performance or safety. Regular testing and maintenance of central air conditioning can help you save energy, reduce costs and enjoy a comfortable indoor environment all year round.

